Consordinis articles are written by musicians who independently research, test, and recommend the best instruments and products. We are reader-supported. When you purchase through links in our articles, we may earn an affiliate commission.
There are two types of guitar players. One type simply plugs their guitar into the amp because they don’t need effects to sound good.
The other type… Well, let’s just say that when you enter the world of guitar pedals, there’s no coming back.
The thing with guitar pedals is that they open up a whole new world of possibilities.
Whether you’re just looking for a way to improve your tone or want a totally different sound, it’s just the matter of finding the right pedal.
To be honest, even after years of dealing with music equipment, combining multiple pedals, getting the right order in the chain, and making sure everything gets hooked up properly can get a bit tough.
So, if you’re a beginner guitar player that wants to know more about different pedals, or even an advanced guitarist that hasn’t handled them so far, you’ve come to the right place!
Contents
The Basics
First of all, let’s take a look at the terminology and the most important things to consider when talking about guitar pedals.
Hooking the Pedals Up
First, you need to turn off your amp and pedals. In order to avoid loud cracks and noises, you should try to do this every time you turn on your gear.
Once you’ve turned everything off, it’s time to connect your pedal to your amp. If you have an FX Loop input, connect it there. If not, your standard guitar input will do just fine.
Now, probably the most important part:
- The cable that goes from the guitar to the pedal goes into the IN input
- The cable that goes from the pedal to the amp goes into the OUT output
Next, make sure that all the knobs on both the pedal and amp are turned all the way down. You don’t want to turn on your gear and have it blast on full volume.
Finally, it’s time to turn everything on. It’s generally a better idea to turn the amp on first, then the pedal.
Depending on the type of pedal you’re using, it’s best if you set your tone and EQ on the amp first. Once you are satisfied with the clean signal, click the pedal, and set the parameters there.
If there is a volume knob on the pedal, you should tweak it and balance the volume levels, so your sound is coming out at the same level with the pedal on and off.
Unless you’re using a specific pedal which you plan on turning on at, for example, solos, this is the general rule you should follow.
Pro Tip! – Always unplug your cables after you’re done playing. Even if there is no signal coming through the cables, the battery inside the pedal is still being drained!
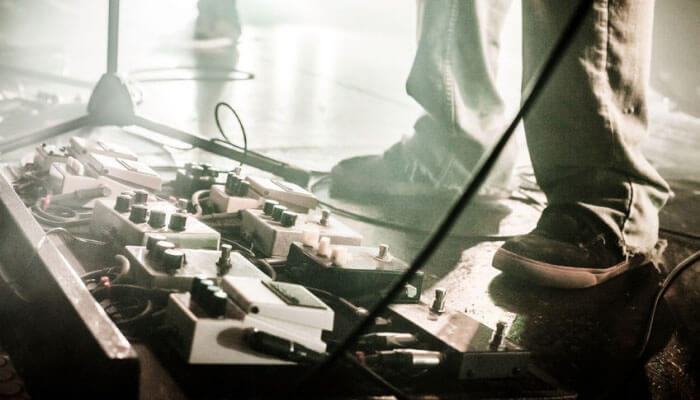
The Right Pedal Order
Some guitarists may argue that there is no universally right order in which you chain your pedals.
However, there are a couple of tips you can follow in order to get the most out of your multiple pedal setup.
The whole idea behind this is that pedals react to altered signals differently. You won’t get the same result with two different setups that vary in the order of the pedals.
Let’s see an example:
Tuner – Compressor/Filter – Overdrive/Distortion – Modulation
Here you can see that the signal first gets compressed, or put through a filter before distortion or overdrive is added.
Lastly, the already modified signal gets put through modulation pedals such as phasers, flangers or chorus.
If you’ve tried different EQ and preset settings on your pedals, but still can’t seem to achieve that tone you were looking for, don’t be afraid to switch the order.
At the end of the day, you’re looking for that unique and specific sound that will complement the riffs and melodies you came up with!
Additional Gear
Only using one pedal doesn’t really require any additional pieces of equipment. But, as we’ve already stated, once you try out several different ones, you can easily get hooked as you explore the different possibilities pedals provide.
On the other hand, handling multiple pedal setups can get pretty complicated, pretty fast.
To make things much easier, there are a couple of things you should consider buying:
- Pedalboards – More than just a simple piece of wood (or plastic), a pedalboard makes organizing multiple pedals much easier. You can stick your pedals on the pedalboard using velcro, and some are even integrated into a case with a handle, so you can move it around easily.
- Patch Cables – These are shorter versions of the cables you’re already using. As they are much shorter, using them to connect pedals to each other is way more convenient.
- Power Patch Cables – Similar to the previously mentioned audio patch cables, these are used to organize the power cables in a more ergonomic fashion. By using one of these, you only need one outlet instead of one for each pedal.
Pro Tip! – Whether you’re doing a live show or simply going to band practice, make sure that you have your batteries as well as power adapters.
Batteries can drain pretty fast, and power adapters get broken easily. Having an alternative at all times can save a lot of time and nerves!
Different Types of Pedals
Now that we’ve covered all the basics, and you know how to connect them to your amp and guitar, it’s time to see all the different types out there.
Analog vs. Digital
Before we take a look at all the various pedals out there, it’s important to point the difference between analog and digital pedals.
- Analog Pedals – These use analog electronics, and offer a more natural-sounding tone, but with limited capabilities.
- Digital Pedals – Digital controllers are used, which can widen the range and number of different effects, but can sometimes sound too robotic.
Tuner
This one is pretty obvious. Having a tuner pedal instead of a regular one, or a clip- on, gives you the ability of quickly muting your signal, tuning your guitar, and getting back on track in no time.
Some tuner pedals, as well as other effect pedals, can be much more expensive than other models doing the same thing.
That can be because they offer True Bypass. This means that the signal isn’t altered at all when the pedal is turned off.
Though you may not always notice the difference, professional musicians value this feature.
Volume
It’s not always possible to control the volume on your guitar, especially while you’re playing. That’s where the volume pedal kicks in.
Mostly used for fade ins, fade outs, or volume swells, it gives the riffs you’re playing a nice flavor.
EQ
If you feel like you can’t really dial in the right tone on your amp equalizer, the EQ pedal is there to solve your problem.
Whether you use it constantly or when playing certain parts of songs, it gives you the ability to fine-tune your sound.
Most EQ pedals offer 7 bands, unlike 3-band EQs on amps.
Using one of these may be a bit complicated at first, but once you’ve gotten the hang of it, you will know exactly what to change in different circumstances.
Boost
Boost pedals are pretty much self- explanatory. They increase the output of the signal your guitar sends to the amp.
This means that the more you crank this pedal up, the less gain your amp needs to achieve a distorted tone.
They are particularly useful when using tube amps, as they produce a natural overdrive with a stronger signal.
You can use them to boost your volume during solos or to simply achieve a fatter sound without adding any distortion.
Noise Gate
High gain settings and multiple pedal setups are great for getting an aggressive and fat sound.
However, there is certainly going to be some unwanted noise.
That’s where the noise gate pedal steps in, as it cuts off the unwanted sound that’s getting from the pedals to the amp.
They are very useful at moments when you stop playing in a song and tame the crackling and buzzing of your multi-pedal setup.
Compressor
If you are a beginner guitarist, chances are that the dynamic of your playing isn’t very good. This means that you tend to pick your string with uneven force.
A compressor pedal evens this out, and makes the volume consistent, no matter how hard or soft your picking gets.
It simply makes your playing sound tighter and more in level.
Tremolo
Simply put, tremolo sounds like you’re playing around with your volume knob, turning it up and down very quickly.
Of course, it sounds way cleaner when you use the pedal than doing it by yourself.
The main parameters you can change on tremolo pedals are the volume span and the time it takes for it to change.
The effect is pretty similar to phaser and flanger pedals, but still unique enough when compared to them.
Reverb
Although many amps have a built-in reverb effect, it doesn’t always sound good.
Reverb can be described as basically echo, with a couple of different settings to choose from when it comes to various atmospheric sounds.
Think of it like this, you can crank it up all the way, and it will sound as if you’re playing in a cave.
It’s mostly used with a clean tone but can sound pretty interesting with added distortion.
Chorus
This effect mimics multiple guitars playing at the same time, but slightly out of time.
It’s mostly used to achieve a more full and thick tone.
While you can use the chorus pedal by itself, it really shines through when combined with other pedals.
Delay
This one is pretty straightforward. The pedal takes your signal, delays it for a brief moment, and plays it back.
You can adjust the repeat rate and intensity, as well as the amount of echo on most pedals.
Some musicians prefer analog delay pedals because they just sound more natural.
Digital ones, on the other hand, are able to hold the delay much longer.
Flanger
Pretty similar to the chorus pedal, flanger pedals provide a slightly more expressed effect, with the pitch going up and down again. Something like an airplane whizzing past you.
It too can be used to get more thickness in your tone.
Phaser
Very close to the flanger and chorus pedals, the phaser is used to get a sweeping sound.
Parameters include the height of the peaks and troughs this pedal makes, so you can play around with various different sounds.
Looper
Though not exactly something you would consider as an effect, looper pedals can come in as handy in certain situations.
As you can record and play back a certain part of a riff or melody, it’s widely used by solo musicians or guitarists who like experimenting with multiple layers of guitars on stage.
Octave pedal
This pedal is used to add an additional octave to the note you’re currently playing.
Whether you’re using it to achieve a richer sound or to get some very unusual sounds, it’s pretty fun to play around with.
Wah
The way pedal makes a Wah-Wah noise. As funny as it may sound, that’s the best way to describe it.
Unlike other pedals we’ve mentioned so far, the controls on this one are made so you can control the timing and intensity of the effect by simply pushing the pedal one way or the other.
It’s great for adding more flavor to solos or simple chord strums.
If you’re still not sure how it sounds, just think of any part of any Metallica song that’s played by Kirk Hammett!
Overdrive
Once again, many amps offer a built-in overdrive, but in order to get the best sound, you should look for an OD pedal.
Unlike classic distortion, it gives your sound that gritty feel but conserves the sound of both the guitar and amp.
Distortion
A bit heavier than regular overdrive, distortion distorts your sound (duh), but can also hide the natural tone of your guitar.
If you need a more aggressive sound, distortion is the way to go.
Fuzz
The harshest sound is achieved by using fuzz pedals. The name pretty much describes the sound, it’s fuzzy, with a lot of buzz and crackling.
Unlike distortion pedals, fuzz pedals are generally used when playing stoner and doom metal, or psychedelic rock.
The best way to view these 3 types of pedals is like this:
Overdrive – Distortion – Fuzz
The amount of distortion and saturation gets increased from left to right.
Wrapping Things Up!
Well, we’ve managed to cover the most commonly used pedals out there.
At the end of the day, it’s all about experimenting with different pedal combinations and finding the right sound for your needs.
We hope that this article was helpful, and as always, thanks for reading!